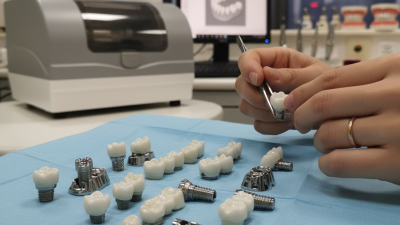
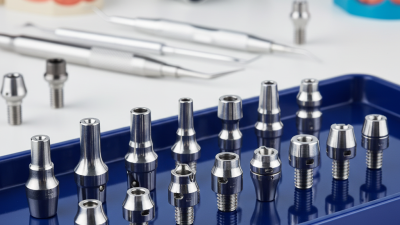
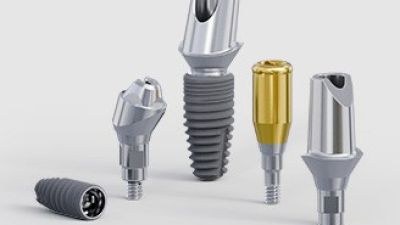
Picking the right Implant Abutment isn’t just a small lab decision — it really influences how the emergence profile looks, supports the tissue, how easy it is to retrieve later, and how well it holds up over time. The patient’s biotype plays a big role here too, along with the position of the implant itself.
According to Grand View Research, the global market for Dental Implants hit around USD 5.94 billion in 2023, and they’re expecting this growth to keep going through 2030. Meanwhile, Fortune Business Insights points out that there’s a rising demand for custom-made, digitally designed implant parts. That’s a sign of market momentum, but it doesn’t necessarily guarantee clinical success.
At the end of the day, the clinical decision is deeply personal.
Dr. Carl E. Misch, a well-known expert in implant dentistry, once said, “The prosthetic restoration is the ultimate goal of implant dentistry.” His point is that the abutment should be considered as part of the whole restoration plan, rather than just a simple connector.
When planning, a clinician needs to look at things like the implant’s angle, how thick the soft tissue is, the space available between bites (interocclusal space), how easy it is to keep everything clean, and what the final crown shape will look like. Sometimes, a stock abutment works fine for straightforward back teeth, but for more demanding front restorations, a custom or angled abutment might be the smarter choice. Plus, whether you go with a cemented or screw-retained crown also impacts the risks involved.
Choosing the right healing abutment — the one used during provisional phases — needs careful thought too. Its size, height, and shape can really influence how the tissue forms around the future crown. Even small tweaks can be noticeable in the patient’s smile.
But here’s the thing: no checklist can replace good clinical judgment.
That’s the uncomfortable truth. While manufacturer info can make comparisons easier, patients rarely behave as simply as the data suggests. Digital workflows can boost accuracy, but they don’t prevent all planning mistakes. This guide looks at different materials, connection styles, tissue management techniques, potential mechanical issues, and maintenance info — all to help clinicians pick an implant abutment with a bit more confidence, reducing unnecessary compromises and making sound decisions easier.
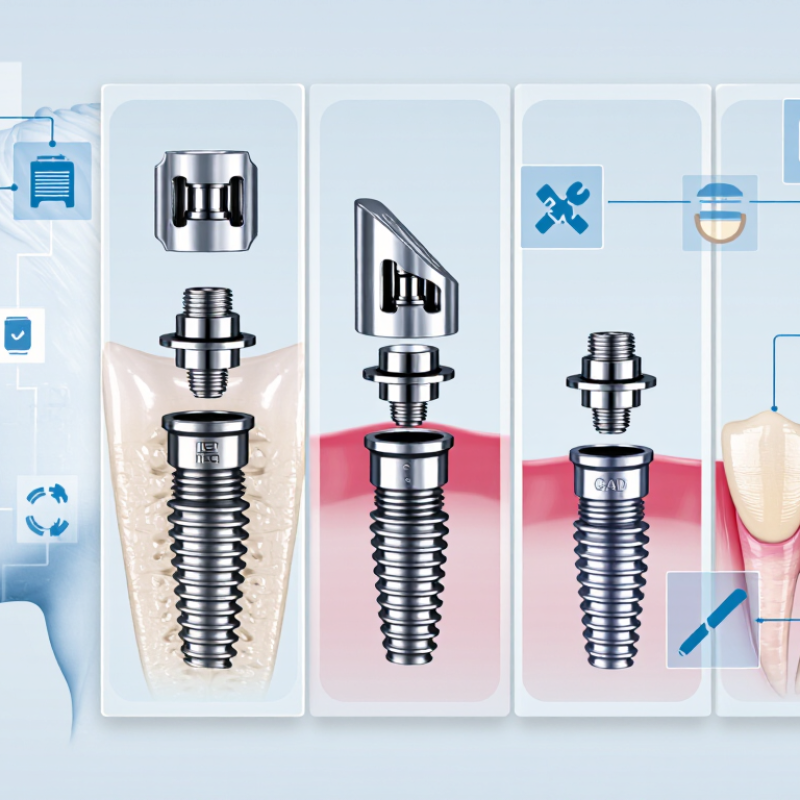
An implant abutment is the connector between a dental implant and its crown, bridge, or denture. It transfers chewing forces and shapes the visible emergence of the restoration. It also supports soft-tissue stability around the implant.
A healing component is different. A Tooth Implant Healing Abutment temporarily guides gum tissue during healing. Its height and diameter should match tissue thickness, implant depth, and the planned crown profile. The final abutment may be customized for angulation, margin position, and screw access. Small component. Significant effect.
The ITI Consensus Conference emphasizes prosthetically driven implant placement and careful soft-tissue management. These principles influence abutment selection. A 2015 systematic review by Derks and Tomasi reported peri-implantitis in about 22% of patients. Cleaning access and tissue contours therefore deserve serious attention. The number is concerning, though definitions varied across studies. It should not be treated as a universal prediction.
A clinician usually evaluates implant position, tissue biotype, occlusal forces, restoration material, and hygiene access before choosing an abutment. A narrow profile may protect tissue but weaken support. A wider profile may improve emergence but create cleaning challenges. Cement retention can also leave hidden residue. Screw-retained designs are not automatically better. The right choice depends on anatomy, function, and long-term maintenance.
How to Choose the Right Implant Abutment?
Which Abutment Types Suit Different Implant Restorations?
The restoration should guide the abutment choice, not the other way around. For a single posterior crown, a stock straight abutment may provide reliable support and efficient seating. A custom abutment becomes more useful when the gingival margin is uneven or the implant emerges too far facially. For multiple-unit bridges, screw-retained designs can simplify retrieval and reduce cement-related concerns. Cement-retained restorations may help when the access channel would appear on a visible surface.
An Angled Abutment Dental Implant solution can redirect the screw channel when implant placement is not ideal. However, angulation increases planning demands. The clinician must assess occlusion, soft-tissue thickness, emergence profile, and available restorative space. Digital planning and a verified impression improve accuracy, but they do not replace clinical judgment. A 2012 systematic review by Pjetursson and colleagues reported approximately 94.5% five-year survival for implant-supported single crowns. That figure describes restorations, not every abutment design. The distinction matters.
Tips: Match the abutment height to the tissue depth. Check the final margin with a periodontal probe. Use a custom option for demanding esthetic zones. Confirm torque using the manufacturer’s documented protocol. The ITI consensus reports also stress prosthetically driven planning and retrievability. In practice, a “universal” abutment rarely exists. I have seen a small emergence mismatch create a large hygiene problem. Therefore, reassess the soft-tissue contour before laboratory fabrication, even when the scan looks clean.
Implant position strongly influences abutment design. A facially placed implant can create a bulky crown contour and visible metal risk. A deeply placed implant may require a taller transmucosal profile. Both situations demand careful planning. The 2015 Journal of Clinical Periodontology systematic review reported peri-implant mucositis in about 43% of implants and peri-implantitis in about 22%. These figures underline the importance of cleanable contours, not only immediate appearance.
Gum conditions matter just as much. Thin, delicate tissue often shows recession or gray discoloration more readily than thick tissue. The 2017 World Workshop classification recognized soft-tissue phenotype as an important factor in peri-implant risk assessment. A clinician may therefore select a narrower emergence profile, a customized abutment, or a carefully designed Prefabricated Implant Abutment. The choice depends on tissue thickness, implant depth, angulation, and the patient’s cleaning ability. There is no universal shape.
Look closely at the healing site. A scalloped gum margin, limited keratinized tissue, or a deep facial concavity can change the plan. Digital scans improve communication, but they do not replace probing, photographs, and clinical judgment. Sometimes a standard abutment fits mechanically yet produces an awkward crown contour. That is easy to miss on a screen. Experienced teams should reassess the provisional crown, hygiene access, and tissue response before finalizing the abutment. Evidence guides the decision, but biology remains less predictable than the software suggests.
Choosing between stock, custom, and angled abutments starts with anatomy, not convenience. A stock abutment suits a straightforward implant position with adequate tissue support. It is efficient and usually more affordable. However, its fixed emergence profile may leave excess cement or poor contouring around a thin gingival margin. An Implant With Healing Abutment can help shape soft tissue before the final restoration, especially when the tissue looks flat or unstable.
Custom abutments are valuable when the implant platform sits deep, facially, or near adjacent roots. Digital design can control emergence, margin position, and contact points more precisely. The 2023 ITI Consensus Report emphasizes prosthetically driven planning and soft-tissue management as key factors for predictable outcomes. A 2023 systematic review reported five-year survival above 95% for many implant-supported single crowns, but survival does not guarantee ideal esthetics or hygiene.
Angled abutments can correct a compromised implant axis and reduce screw-access problems. They are useful in posterior areas and limited-opening cases. Yet, the correction angle may increase restorative complexity and loading concerns. Reports from the International Team for Implantology advise evaluating implant position, occlusion, cleansability, and retrievability together. I have seen “simple” stock solutions create bulky contours. That was avoidable. Clinicians should also question whether a custom component adds real biological value or only technical elegance.
How to Choose the Right Implant Abutment?
Material, shape, and connection design can change how an implant restoration behaves under daily chewing forces. Titanium often provides dependable strength and fatigue resistance, while ceramic may offer a more natural appearance near thin gum tissue. However, appearance alone should not decide the selection. The clinician must consider tissue thickness, occlusal loading, hygiene access, and the restoration’s position. A narrow abutment may support better emergence in limited spaces, but excessive reduction can weaken it. Small dimensions matter.
Shape influences both biology and function. A carefully contoured profile can guide soft-tissue healing and reduce food retention around the crown. It should also leave enough room for cleaning tools. Over-contoured designs may look full in the laboratory but create difficult plaque-control areas in the mouth. This is where judgment becomes messy. A radiograph, digital scan, and direct examination should support the decision, rather than replace clinical reasoning.
The connection design deserves close attention. Internal connections can improve rotational stability, but fit, manufacturing accuracy, and correct tightening remain essential. A mismatched connection may increase micromovement and contribute to screw loosening or component wear. Evidence should guide the choice, yet patient habits and bite forces still matter. There is no universal winner. Even experienced clinicians should review the implant system’s documented tolerances and maintenance requirements before finalizing the abutment.
| Design Dimension | Common Option | Typical Characteristics | Influence on Performance | Clinical Selection Considerations |
|---|---|---|---|---|
| Abutment Material | Titanium | High strength-to-weight ratio; elastic modulus approximately 105–120 GPa; widely used for prefabricated and custom abutments. | Provides reliable mechanical strength and fatigue resistance when properly designed. Generally suitable for posterior loading and narrow restorative spaces. | A common first choice when mechanical reliability is the priority. Soft-tissue thickness and gingival display should be assessed because the metallic color may become visible through thin tissue. |
| Zirconia | Tooth-colored ceramic with high flexural strength; elastic modulus commonly reported around 200 GPa, depending on composition and testing method. | Improves optical integration in the anterior region and may reduce grayish tissue discoloration. Ceramic strength can be affected by geometry, surface damage, and connector design. | Often selected for visible anterior sites or thin peri-implant mucosa. Adequate ceramic thickness, rounded transitions, and controlled occlusion are important. | |
| Titanium Base with Zirconia Superstructure | Combines a metal interface at the implant connection with a tooth-colored ceramic restorative portion. | Can balance connection durability and esthetics. The interface depends on precise fit, bonding, and adequate mechanical support. | Useful when a ceramic emergence profile is desired without placing zirconia directly at a highly stressed implant connection. | |
| Cobalt-Chromium or Other Alloys | High-strength dental alloys used mainly in selected custom frameworks or laboratory-fabricated components. | High stiffness and strength, but color, density, manufacturing method, and tissue response must be considered. | May be appropriate for specific restorative designs, but is less commonly selected when soft-tissue esthetics are the primary concern. | |
| Abutment Shape | Straight Abutment | Implant axis and restorative axis are closely aligned; usually offers a simple load path and straightforward fabrication. | Generally minimizes lateral leverage compared with a severely angled design, provided the implant position is favorable. | Preferred when the implant is positioned close to the planned crown axis and adequate restorative space is available. |
| Angled Abutment | Common correction angles include approximately 15° or 25°, although available angles vary by system. | Corrects implant angulation and improves screw-access positioning, but increases the importance of geometry and occlusal control. | Greater angulation can increase bending moments and stress concentration if the crown is overcontoured or occlusal loading is unfavorable. | Use when needed for prosthetic alignment, while maintaining a cleansable profile and avoiding excessive cantilever or non-axial loading. |
| Stock Abutment | Prefabricated shape and height with limited modification options. | Efficient, cost-effective, and generally consistent, but may not reproduce the ideal emergence profile in every case. | Performance is predictable when implant position and soft-tissue contours are favorable. Excessive intraoral modification can compromise geometry or surface integrity. | Suitable for routine cases with adequate implant placement and a relatively standard restorative contour. |
| Custom Abutment | Digitally or conventionally designed to match implant position, tissue architecture, crown form, and interproximal contacts. | Allows more precise control of emergence profile, margin location, height, angulation, and cleansability. | May improve restorative fit and soft-tissue support when designed correctly; excessive contour can make hygiene difficult and increase plaque retention. | Often advantageous in esthetic zones, multiple-unit cases, nonstandard implant positions, or limited restorative space. |
| Emergence Profile and Margin Design | Concave or straight transmucosal contour; supragingival, equigingival, or subgingival margin depending on the restoration. | Controls tissue support, cleansability, cement removal, and the transition from implant platform to crown. | Overcontouring may impair hygiene and soft-tissue health; an appropriately contoured profile can support access and esthetic integration. | Design the contour according to tissue thickness, implant depth, crown dimensions, and the need for retrievability. |
| Implant–Abutment Connection | External Hexagon | The anti-rotation feature is located above the implant platform and is externally exposed. | Provides indexing and anti-rotation, but the external geometry can be more sensitive to lateral loading, screw loosening, and component fit in some situations. | Can be appropriate when a well-established restorative protocol is required; precise torque, passive fit, and occlusal control remain essential. |
| Internal Hexagon | The anti-rotation feature is located inside the implant body, increasing the depth of component engagement. | Usually provides good indexing and may improve lateral stability compared with a shallow external interface, depending on geometry. | Load distribution is influenced by engagement depth, wall thickness, screw design, manufacturing tolerances, and implant diameter. | A versatile option for single crowns and fixed restorations when the connection is correctly matched and fully seated. |
| Conical or Tapered Connection | A tapered implant–abutment interface creates intimate contact through wedging or friction, often combined with an internal index. | Can provide strong mechanical interlocking and reduced micromovement when manufacturing accuracy, seating, and preload are controlled. | May reduce microgap and component movement, but it does not eliminate biological or mechanical complications and is highly dependent on fit and torque. | Consider for cases where connection stability and reduced interface movement are important, while following the specific system’s torque and maintenance protocol. |
| Rotational Versus Non-Rotational Interface | Anti-rotational components are used for single-unit restorations; rotational components may be used for selected splinted or multi-unit designs. | The correct interface depends on whether each abutment must independently resist crown rotation or whether the prosthesis is intentionally connected. | Incorrect selection can cause poor seating, rotational instability, inaccurate prosthetic positioning, or excessive stress on screws and interfaces. | Confirm the restoration type, indexing requirement, implant compatibility, and laboratory workflow before ordering components. |
| Performance and Maintenance Factors | Screw Preload and Torque | The tightening torque specified for the compatible screw and connection; values vary by implant system and component material. | Adequate preload helps maintain joint stability. Under-torquing, over-torquing, contamination, or repeated reuse can compromise the connection. | Use the manufacturer-specified calibrated torque protocol and verify complete seating before loading. |
| Crown Retention Method | Screw-retained, cement-retained, or a combined design. | Screw retention improves retrievability and avoids excess cement, but screw access may affect esthetics and crown design. Cement retention can improve access-hole esthetics but requires careful cement control. | Both methods can be clinically successful when appropriately planned. Residual subgingival cement is a recognized risk factor for peri-implant soft-tissue inflammation. | Favor retrievability where feasible and ensure margins are accessible enough for thorough cement removal if cement is used. |
| Occlusal Loading | Axial loading, lateral loading, cantilever forces, parafunction, and crown-to-implant ratio. | Non-axial forces increase bending moments at the abutment screw and implant connection. | Appropriate crown width, cusp form, contacts, and occlusal adjustment can reduce mechanical complications, although no design eliminates overload risk. | Use conservative occlusal design for bruxism, reduced bone support, long crowns, narrow implants, or cantilevered restorations. |
| Soft-Tissue and Hygiene Access | Transmucosal height, contour, margin position, interproximal access, and polishability. | A smooth, cleansable surface and properly supported tissue contour are essential for long-term maintenance. | Bulky contours, rough surfaces, deep margins, and inaccessible contacts can increase plaque retention and complicate professional and patient hygiene. | Select the abutment height and profile based on mucosal thickness, probing access, emergence angle, and the patient’s cleaning ability. |
| Manufacturing Accuracy and Fit | Digitally milled, cast, or prefabricated components produced within the compatible system tolerance. | Fit depends on scan accuracy, library selection, machining quality, connection tolerances, seating, and laboratory verification. | Poor fit can increase stress, screw loosening, fracture risk, and biological complications. | Use validated components, confirm the correct implant platform and diameter, and inspect seating and contacts before final delivery. |
How to Choose the Right Implant Abutment?
What Clinical and Patient Factors Guide the Final Abutment Decision?
The final abutment choice begins with the patient, not the component. A thin facial tissue profile may require a carefully positioned margin and a contour that supports natural emergence. Limited opening, implant angulation, bone levels, and restorative space also affect the decision. A periapical radiograph and digital scan can reveal problems that a visual examination misses.
Occlusion deserves equal attention. Bruxism, a deep bite, or a long cantilever can increase mechanical stress. The patient’s hygiene routine matters too. A bulky contour may trap plaque around a crown that looks excellent initially. Smoking, diabetes control, periodontal history, and attendance for maintenance can alter biological risk. The International Team for Implantology recommends individualized planning, prosthetic control, and long-term maintenance rather than a one-size-fits-all selection.
Evidence supports careful restraint. A systematic review by Pjetursson and colleagues reported approximately 94.5% five-year survival for implant-supported single crowns, while technical complications remained clinically relevant. Survival is not perfection. Screw loosening, ceramic fracture, peri-implant inflammation, and excess cement can still occur. Retrievability may therefore outweigh a small cosmetic advantage in some patients. I have found that the “best” abutment can change after checking occlusion and hygiene access. That uncertainty is useful. It encourages reassessment before final seating, especially when esthetics, tissue thickness, or the patient’s maintenance habits are less predictable.
Getting started with a bone-level tapered cylindrical implant system begins with a thorough clinical assessment. The dentist evaluates the patient’s oral health, bone volume, bite, medical history, and aesthetic expectations before creating an individualized treatment plan. Digital imaging and careful case analysis can help determine the appropriate implant position, size, and restorative approach, supporting a safer and more predictable procedure.
The implant system combines advanced surface treatment technology with a tapered cylindrical design. Its surface is developed to promote strong affinity with bone tissue, while the shape is intended to provide excellent initial stability during placement. These features help the implant establish a close connection with surrounding tissue and support the healing process. For clinicians, the design also offers convenient handling and a clear surgical workflow, making it suitable for a wide range of daily restorative needs.
After placement, patients should follow professional instructions for oral hygiene, diet, medication, and follow-up visits. Regular monitoring allows the dental team to assess healing and determine when the final restoration can be completed. Through continued refinement based on clinical experience and patient feedback, the system is designed to help reduce discomfort, support functional recovery, and contribute to a natural-looking, comfortable restorative result.
A stock straight abutment often provides reliable support and efficient seating. A custom design helps with uneven margins or facial implant placement. Keep it practical.
Consider one when the gum margin is uneven or the implant emerges too far facially. It can improve the emergence profile and crown contour. The tissue still needs checking.
Screw-retained designs can simplify retrieval and reduce cement-related concerns. They may work well when access channels remain acceptable. Planning remains essential.
It may help when the screw access channel would appear on a visible surface. The margin must remain accessible for cleaning and evaluation. Cement is not automatically harmless.
An angled abutment can redirect the screw channel when placement is not ideal. Angulation increases planning demands and may affect occlusion, space, and emergence. It is not a shortcut.
Thin tissue may show recession or gray discoloration more easily. A narrower emergence profile or custom design may reduce contour problems. Biology can surprise the plan.
Check tissue depth, the final margin, occlusion, soft-tissue thickness, and cleaning access. Use probing, photographs, scans, and a verified impression. A scan is not enough.
No universal shape suits every implant position, tissue condition, or restoration. A standard abutment may fit mechanically yet create poor hygiene access. I might trust a clean scan too much.
Choosing the right Implant Abutment is an important step in creating a stable, functional, and natural-looking dental restoration. The abutment connects the implant to the crown, bridge, or denture, so its design must match the restoration type, implant position, available space, and surrounding gum condition. Factors such as soft-tissue thickness, emergence profile, angulation, and esthetic demands can strongly influence the final selection.
Depending on the clinical situation, a dentist may choose a stock, custom, or angled abutment. Stock options can be efficient for straightforward cases, while custom designs offer greater control over fit, contour, and appearance. Material strength, shape, connection design, hygiene access, occlusion, bone support, and the patient’s oral habits should also be considered. By evaluating both clinical requirements and patient expectations, the dental team can select an abutment that supports long-term comfort, durability, tissue health, and restoration performance.