Picking out Suture Scissors in 2026 isn't just about looking at a shiny catalog image and calling it a day. You really gotta think about what kind of scissors will work best for the job, how they feel in your hand, and what your facility needs for reprocessing. Things like blade shape, tip design, how they cut, and what material they’re made from all matter—plus, consistency from one pair to another is key. You might find that a comfy handle feels totally different after hours of use, and let's be honest, a cheap pair might hide some uneven finishing. Those tiny details? They really do count.
This reminds me of what surgeon and patient-safety expert Atul Gawande once said: “Better is possible. It does not take genius. It takes diligence.” His words aren’t about scissors specifically, but they’re a solid reminder that careful selection means paying attention to the small stuff. Take a close look—do the blades come together smoothly? Do the tips give you the visibility and control you need for your sutures? And don’t forget to check that the product info covers what’s in it, how to care for it, and what the manufacturer recommends. Honestly, you shouldn’t assume that every model fits every situation; always do your homework.
Now, this guide is all about practical features, not saying one design is always the best. Do you need straight or curved blades? Fine tips or broader ones? It really depends on what you’re doing, who’s using it, and your local protocols. If you can, try handling samples with colleagues—sometimes that smooth hinge or the overall feel can matter way more than what’s on the specs sheet. And let’s be real: no buying checklist can replace good clinical judgment. A product page won’t show every real-world hiccup, so the goal is to make a solid, justified choice—not a perfect one.
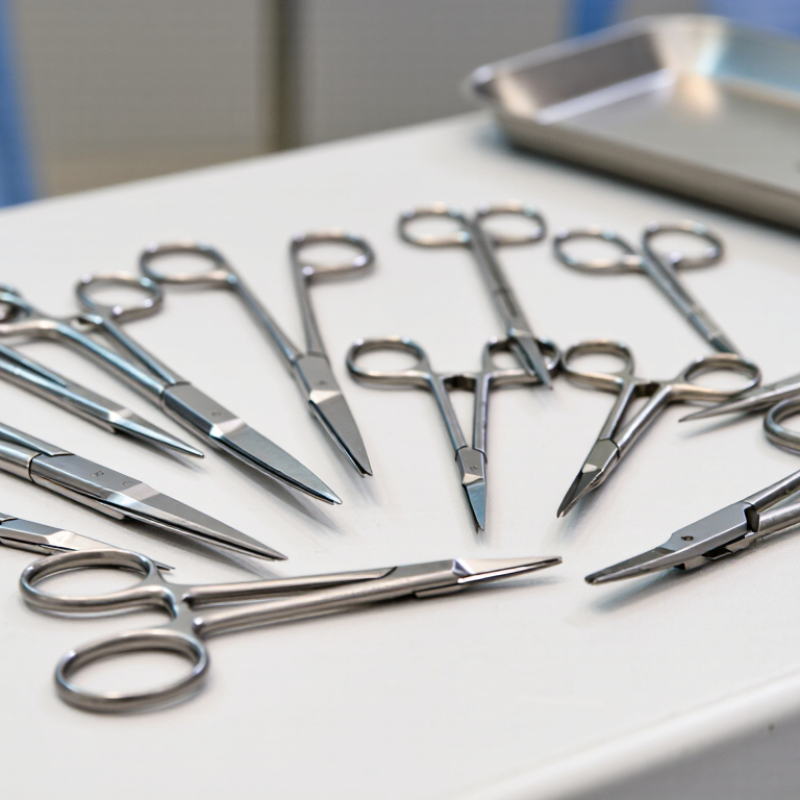
Suture scissors are compact instruments designed mainly to cut suture material cleanly and close to a knot. Many have short, angled blades; some include a small hook or notch to lift a stitch before cutting. Designs vary, so the shape should suit the task and the clinician’s technique. They are not intended for cutting skin or deep tissue.
That distinction matters. General surgical scissors may be designed for dissecting or cutting tissue, with blade geometry suited to controlled work. Suture scissors prioritize access around a knot and a clean cut through thread. Bandage scissors, by contrast, often have a blunt, flattened tip for sliding beneath dressings. They may look similar in a tray, but their tips and edges serve different jobs. A familiar tool can still be wrong for the cut.
Tips: Check the tips and cutting edges before use. Choose a size that reaches the knot without crowding nearby tissue. Keep suture scissors for suture; repeated contact with hard materials can dull fine edges. If a stitch resists, pause and reassess rather than tugging.
Straight suture scissors suit controlled cuts on exposed threads, especially when access is clear and the thread lies flat. Their narrow blades can make small, precise cuts. Curved blades help when the stitch sits close to a rounded surface or is difficult to approach straight on. The curve improves visibility for some users, but it can also make the cutting angle feel less intuitive.
Tip shape matters. Blunt tips can reduce the chance of catching nearby material when slipping beneath a suture, while sharp tips offer better precision in open, visible areas. For delicate work, compact scissors with fine blades may provide more control; for thicker sutures, sturdier blades can cut more cleanly. Test the feel with gloved hands. A slight wobble matters.
Matching the design to the task is only part of selection. Check that blades meet evenly, tips align, and the hinge moves smoothly without excessive resistance. Inspect scissors before use, and follow your facility’s cleaning and sterilization instructions. Suture Scissors Manufacturers may describe models by blade shape or intended use, but those labels do not replace hands-on evaluation. A detail I might overlook: the most delicate pair is not always the easiest to control. Consider the usual thread type, working angle, and the user’s grip.
| Design | Typical features | Best suited cutting task | Advantages | Selection notes |
|---|---|---|---|---|
| Hooked suture-removal scissors | A small hook or guarded tip on one blade; commonly paired with a short, narrow cutting edge. | Removing superficial interrupted sutures by slipping the hook beneath the exposed thread. | Helps lift and guide the suture away from the skin before cutting it. | Use only when the thread can be clearly identified and accessed. Avoid cutting close to skin when the hook cannot be placed safely. |
| Notched suture scissors | A notch near the blade tip helps catch or position a suture strand. | Cutting accessible sutures during removal or trimming, depending on the instrument’s tip shape. | The notch can make it easier to control a single strand without relying on a broad blade opening. | Check that the notch matches the intended thread size and task; it does not replace careful visualization and technique. |
| Straight, fine-point scissors | Straight blades with narrow, pointed tips for direct access and precise cuts. | Trimming exposed suture ends or cutting thread in a clear, accessible field. | Offers a direct line of sight and good control for short, precise cuts. | Pointed tips can injure tissue if used close to the skin; select a guarded or blunt-tip design when appropriate. |
| Curved, fine-point scissors | Curved blades that follow a curved approach to the target. | Cutting thread when a straight approach is awkward or when the working angle is restricted. | Can improve access around contours and help keep the operator’s hand out of the line of sight. | Choose the curve direction and blade length for the site; curved tips still require a clear view of the cutting point. |
| Blunt-tip or blunt/blunt scissors | Rounded tips, with either one or both blade ends blunt. | Cutting accessible suture material where reducing the risk of accidental puncture is a priority. | Rounded tips are less pointed than fine-point alternatives. | May be less effective for engaging a very fine strand or reaching beneath a tight stitch; use a purpose-designed suture-removal tip when needed. |
| Light-duty scissors for fine suture | Short, slender blades designed for controlled work with fine material. | Trimming fine sutures and performing delicate, small-scale cutting tasks. | Allows precise handling in confined areas when the material is within the instrument’s intended capacity. | Do not use delicate scissors on heavy suture, wire, or other materials outside the manufacturer’s intended use; this can damage the blades. |
| Heavy-duty scissors for thicker material | More robust blades and construction than fine-detail scissors. | Cutting thicker suture material when the instrument is specifically rated for that use. | Provides a sturdier cutting option for material that may be unsuitable for delicate blades. | Confirm the intended material and use in the product instructions. A heavier design may be less suitable for fine trimming or close-to-skin suture removal. |
Choosing tip: Match the scissors to the task (suture removal versus trimming), thread thickness, access angle, and required level of precision. Follow clinical protocols and the instrument manufacturer’s instructions for use.
Blade shape should follow the task, not habit. Straight blades give direct access on exposed skin and are easy to guide along a visible suture. Curved blades can help when the working angle is restricted, but they may obscure the cutting tip. For removing sutures near delicate tissue, choose a fine tip with a blunt lower blade; it can slide beneath a stitch while reducing the chance of catching skin. Small details matter.
Length changes control. Short scissors suit close, precise work in a compact field. Longer blades can reach deeper or awkward areas, but may feel less nimble around a small wound. There is no universal ideal: match length to the clinician’s hand, the procedure, and the patient’s anatomy, then check balance and visibility under the lighting used in practice. One global estimate counted 312.9 million operations in 2012, illustrating the broad range of surgical settings—not a single instrument requirement (Weiser et al., The Lancet, 2015).
Before purchase, test the scissors on a suture placed over a practice pad, checking whether the tip slips beneath it without lifting the surrounding surface. Inspect the joint for smooth movement and confirm that the blades meet cleanly at the tip. A Suture Scissors Manufacturer should provide clear specifications for blade shape, working length, and intended use. I’d still avoid choosing by dimensions alone; catalog measurements do not tell you how a tool feels in a gloved hand.
Material choice affects how suture scissors feel, hold an edge, and withstand repeated cleaning. Stainless steel is common because it resists corrosion, but steel quality and heat treatment also matter. Harder blades may stay sharp longer, yet can be more prone to chipping if mishandled. There is no perfect material. A bright, polished finish can look reassuring, but appearance alone does not prove durability. Check the maker’s stated material and care instructions, then consider how the scissors will be used.
Construction details matter in the hand. Look for aligned blades that meet cleanly, a smooth pivot, and handles that sit comfortably during controlled cuts. Excessive looseness can make trimming feel imprecise; a stiff joint can tire the fingers. Rounded, snag-free edges around the rings help during frequent handling. Small differences show up over a long shift.
Tips: Open and close the scissors several times before use. Check for lateral wobble, rough movement, or uneven blade contact. If the tool feels awkward, reconsider it.
A well-finished joint and consistent blade alignment can support predictable cutting, but they do not replace inspection or proper maintenance. Follow the manufacturer’s cleaning and sterilization guidance, and remove damaged instruments from service for assessment. Even a good pair can lose performance after impact or poor care. The less glamorous detail—the pivot—deserves attention.
When choosing suture scissors, assess grip with gloved hands, not bare fingers. The rings should sit securely without forcing the thumb or twisting the wrist. Try several controlled opening-and-closing motions. The action should feel even, with no catching. Small details matter. A slightly awkward grip may become tiring during repeated procedures, though comfort varies by hand size and technique.
Precision shows at the tip. Check that the blades meet cleanly, then test a consistent cut on suitable practice material. Watch for slipping, fraying, or uneven edges. For durability, inspect the pivot, blade alignment, and surface after cleaning and sterilization, following the instrument’s instructions.
The WHO’s 2016 Global Guidelines for the Prevention of Surgical Site Infection report an estimated 11% infection rate among surgical patients in low- and middle-income countries. That figure is not specific to scissors, but it underscores why cleanability and instrument condition deserve attention.
For Wholesale Suture Scissors, compare these practical checks alongside documented material and reprocessing information; price alone says little. I’d still treat a smooth first impression cautiously. Repeated use reveals more.
In 2026, check sterilization compatibility before comparing prices or blade styles. Ask whether the suture scissors are reusable or single-use, and request the applicable instructions for use. For reusable instruments, confirm approved sterilization methods, cycle parameters, and drying requirements. Do not assume every stainless-steel model tolerates the same process. Small details matter.
Review the instrument’s material, finish, joint design, and packaging requirements against your facility’s validated workflow. Steam sterilization may suit some models, while others require different handling; the manufacturer’s documented instructions should guide the decision. Ask for evidence supporting the stated cycles, plus cleaning and inspection guidance. A scissor that looks clean may still have residue near its hinge. That point is easy to overlook.
Purchasing teams should also clarify whether documentation includes traceability details, lot identification, and any required quality records. When comparing Suture Scissors Factories, request written answers rather than relying on catalog claims. Check sample instruments for smooth opening, precise tip alignment, and consistent cutting on suitable test material. One specification may still be unclear, so resolve it before ordering. A careful review reduces surprises during processing and routine use.
Straight blades offer direct access to visible sutures. Curved blades can help in restricted spaces, but may hide the cutting tip.
A fine tip with a blunt lower blade can slide beneath a stitch while helping avoid nearby skin. Small details matter.
Short blades suit close, precise work. Longer blades reach awkward areas but may feel less nimble around small wounds.
Try them on a suture over a practice pad. Check that the tip slips underneath without lifting the pad surface.
Stainless steel resists corrosion, but quality and heat treatment also matter. Look for aligned blades, a smooth pivot, and comfortable handles.
Lateral wobble, rough movement, or uneven blade contact can make cutting feel imprecise. Open and close the scissors several times.
Check whether the instrument is reusable or single-use. For reusable scissors, follow documented cleaning, sterilization, and drying instructions.
Request written specifications, lot identification, traceability details, and quality records. Resolve unclear requirements before ordering.
No. Appearance alone tells little. I’d still inspect the hinge and blade alignment; dimensions do not show how scissors feel in a gloved hand.
Choosing the right Suture Scissors in 2026 starts with understanding how they differ from general-purpose surgical scissors. Their designs are intended for specific cutting tasks, so consider whether a straight or curved blade, a particular tip shape, and an appropriate blade length best suit the clinical work. Matching these features to the intended use can support controlled, precise cutting.
Material quality and construction influence performance, while the handle’s grip, balance, and ease of control affect comfort and accuracy. Assess durability by considering how well the instrument maintains its cutting action through repeated use and reprocessing. Before purchasing, verify compatibility with the sterilization methods used in your setting and check practical requirements such as intended use, handling, maintenance, and procurement criteria. A careful comparison of these factors can help identify scissors that meet clinical needs reliably.